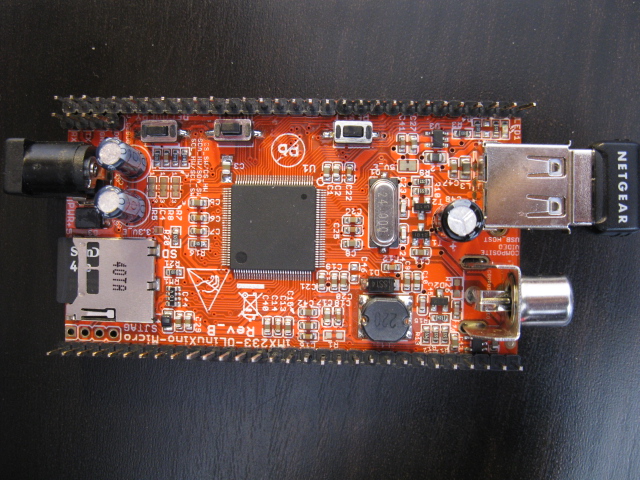
We had our imx233-Olinuxino-Micro in its box for too long but we finally managed to run some electrons through it 🙂
We needed to have our wifi USB module – Realtek RTl8192cu Chipset working. Also, we wanted to connect our TFT LCD displays : the 1.8″ Color TFT LCD display with MicroSD Card Breakout – ST7735R, and try also the 2.8″ 18-bit color TFT LCD with touchscreen breakout board – ILI9325. [Check the next posts for wiring instructions.}
After some pains in finding the right linux kernel and drivers…we followed the great tutorial provided by g-lab, and made a few changes. Hopefully this will be of help for some of you out there. So here we go…
Getting some files
1. Start with a working SD card image. We got imx233 Debian 2GB SD-card image based on Kernel 3.11 following the olimex.com link.
Want to know how to make a bootable SD Card? Look here…
2. Get the package provided by g-lab link, which contains Freescale imx-bootlets, utility elftosb2 and patches for the imx23-board.
git clone -b 3.13-rc4 https://github.com/koliqi/imx23-olinuxino
Building the kernel
You will need to know how to build your own kernel and create a bootable image.
We used the 3.18.3 kernel. You can try another one. It is likely that any 3.x.x will work too.
cd imx23-olinuxino/kernel
wget https://www.kernel.org/pub/linux/kernel/v3.x/linux-3.18.3.tar.xz
To enable SPI we made our own patch. Get it as follows or Read on what you need to do...
Open imx23-olinuxino.dts file
pico arch/arm/boot/dts/imx23-olinuxino.dts
look for ssp1: ssp@80034000 {… and add/change
ssp1: ssp@80034000 {
                #address-cells = <1>;
                #size-cells = <0>;
                compatible = "fsl,imx23-spi";
                pinctrl-names = "default";
                pinctrl-0 = <&spi2_pins_a>;
                status = "okay";
};
by
ssp1: ssp@80034000 {
                #address-cells = <1>;
                #size-cells = <0>;
                compatible = "fsl,imx23-spi";
                pinctrl-names = "default";
                pinctrl-0 = <&spi2_pins_a>;
                status = "okay";

              spidev: spidev@0 {
              compatible = "spidev";
              spi-max-frequency = <1000000>;
              reg = <1>;
              };
};
wget http://www.opentronix.com/pub/olimex012015/spi_dts.patch
tar xvf linux-3.18.3.tar.xz
ln -s linux-3.18.3 linux-mainline
cd into directory linux-mainline to apply i2c patches for imx23-olinuxino board. These are required for your i2c communication devices. Also, apply our SPI patch.
cd linux-mainline
patch -p1 <../0001-ARM-imx23-olinuxino-Add-i2c-support.patch
patch -p1 < ../spi_dts.patch
We found this great driver for our LCD’s. Download sources and install it:
cd drivers/video/fbdev
git clone https://github.com/notro/fbtft.git
echo 'source "drivers/video/fbdev/fbtft/Kconfig"' >> Kconfig
echo 'obj-y += fbtft/' >> Makefile
cd ../../../
wget http://opentronix.com/pub/olimex012015/.configRead on how we got this file...
If you do not use the .config we provide here, you will have to add a few things with the menuconfig. Read more.
Open menuconfig
make ARCH=arm CROSS_COMPILE=arm-linux-gnueabi- menuconfig
You will get something like this
[*] Use appended device tree blob to zImage (EXPERIMENTAL)
[*] Supplement the appended DTB with traditional ATAG information
(console=ttyAMA0,115200 root=/dev/mmcblk0p2 rw rootwait) Default kernel command string
Go to Device Drivers -> Graphics support -> Frame buffer devices->
<*> Support for small TFT LCD display modules --->
   [And inside select yours. As an example, in our case:]
    <M> FB driver for the ILI9325 LCD Controller
    <M> FB driver for the ST7735R LCD Controller
    <M> Generic FB driver for the TFT LCD displays
    <M> Module to for adding FBTFT devices
Compile kernel
make ARCH=arm CROSS_COMPILE=arm-linux-gnueabi- zImage modules
Mount your SD card and do [NOTE: Check where is your SD card partition is mounted and enter the path in the following line. For example we use kubuntu and had it mounted in /media/opiliao/rootfs]:
sudo make INSTALL_MOD_PATH=<add your SD card partition path here> ARCH=arm CROSS_COMPILE=arm-linux-gnueabi- modules_install
make ARCH=arm CROSS_COMPILE=arm-linux-gnueabi- imx23-olinuxino.dtb
cat arch/arm/boot/zImage arch/arm/boot/dts/imx23-olinuxino.dtb > arch/arm/boot/zImage_dtb
Bootlets
Switch into directory boot/elftosb-0.3 and make symbolic link into the compilers default PATH [elftosb2 should be located at /usr/sbin/elftosb2]
cd ../../boot/elftosb-0.3
sudo ln -s pwd/elftosb2 /usr/sbin/
Next, switch into directory boot and do:
cd ..
tar xvzf imx-bootlets-src-10.05.02.tar.gz
Now, switch into directory boot/imx-bootlets-src-10.05.02 and apply patches
cd imx-bootlets-src-10.05.02
patch -p1 <../imx23_olinuxino_bootlets.patch
This patched package require zImage in this directory. We have created zImage_dtb instead.
ln -s ../../kernel/linux-mainline/arch/arm/boot/zImage_dtb ./zImage
make CROSS_COMPILE=arm-linux-gnueabi- clean
make CROSS_COMPILE=arm-linux-gnueabi-
You should be ready to dump the image to your SD card. If your SD device is /dev/sdb1 do: [Note: you can check it by doing: sudo fdisk -l]
sudo dd if=sd_mmc_bootstream.raw of=/dev/sdb1
The card is ready, insert on your board and boot….IT WORKS!
Take a 10 min break before continuing…see you in the next post 😉

![Building a kernel for imx233-Olinuxino-Micro + wireless + TFT LCD [ST7735R/ILI9325] - I](http://zerpoii.opentronix.com/wp-content/uploads/2015/01/olimex-minicom-config-wireles12.jpg)