
Introduction
Little Home lamps define what a companion light is. It is present, it’s gentle, and it’s in tune with you.
Try it!
You can take it with you wherever you go. It is pocket-sized and battery powered allowing you to move it with ease from one place to another. Will you dare to simply take it to your favourite café or to work?
It is a soft and gentle light that will make you smile! Brightness can be adjusted according to the surrounding luminance.
It is always in tune with you. A control button allows you to select the colour that best matches your mood.
Love it!
How to start?
Ingredients
- 3D printed parts
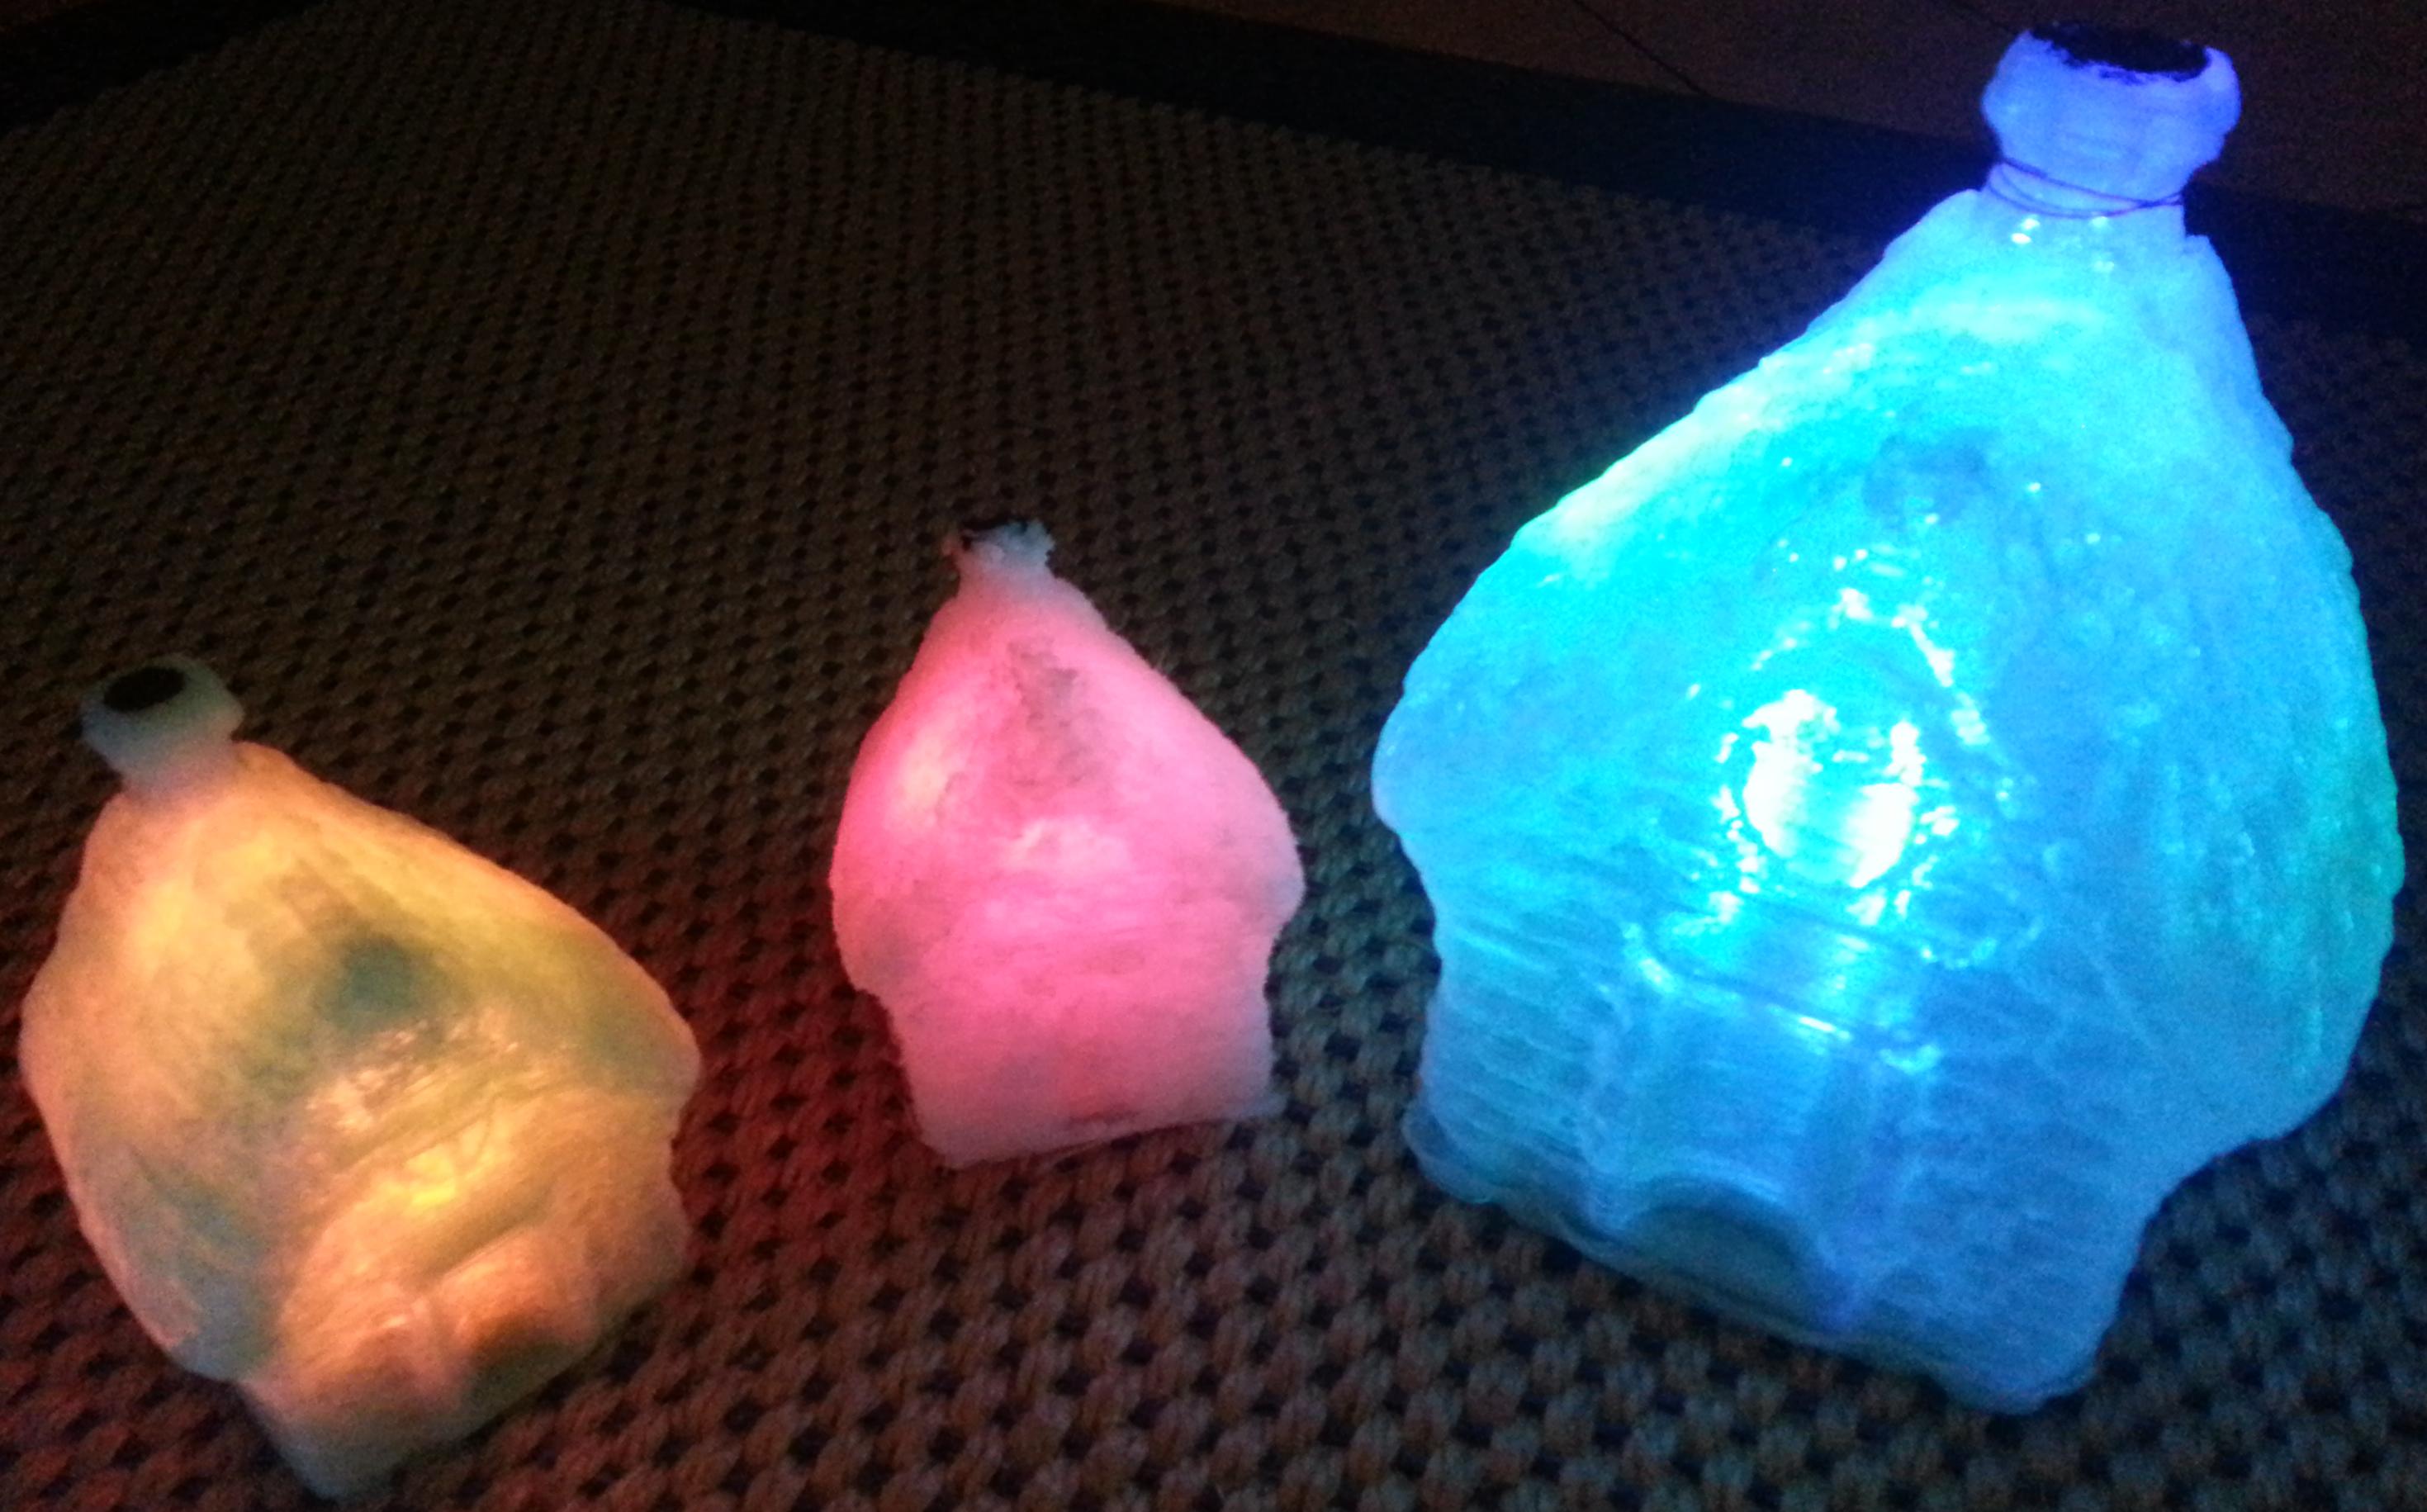
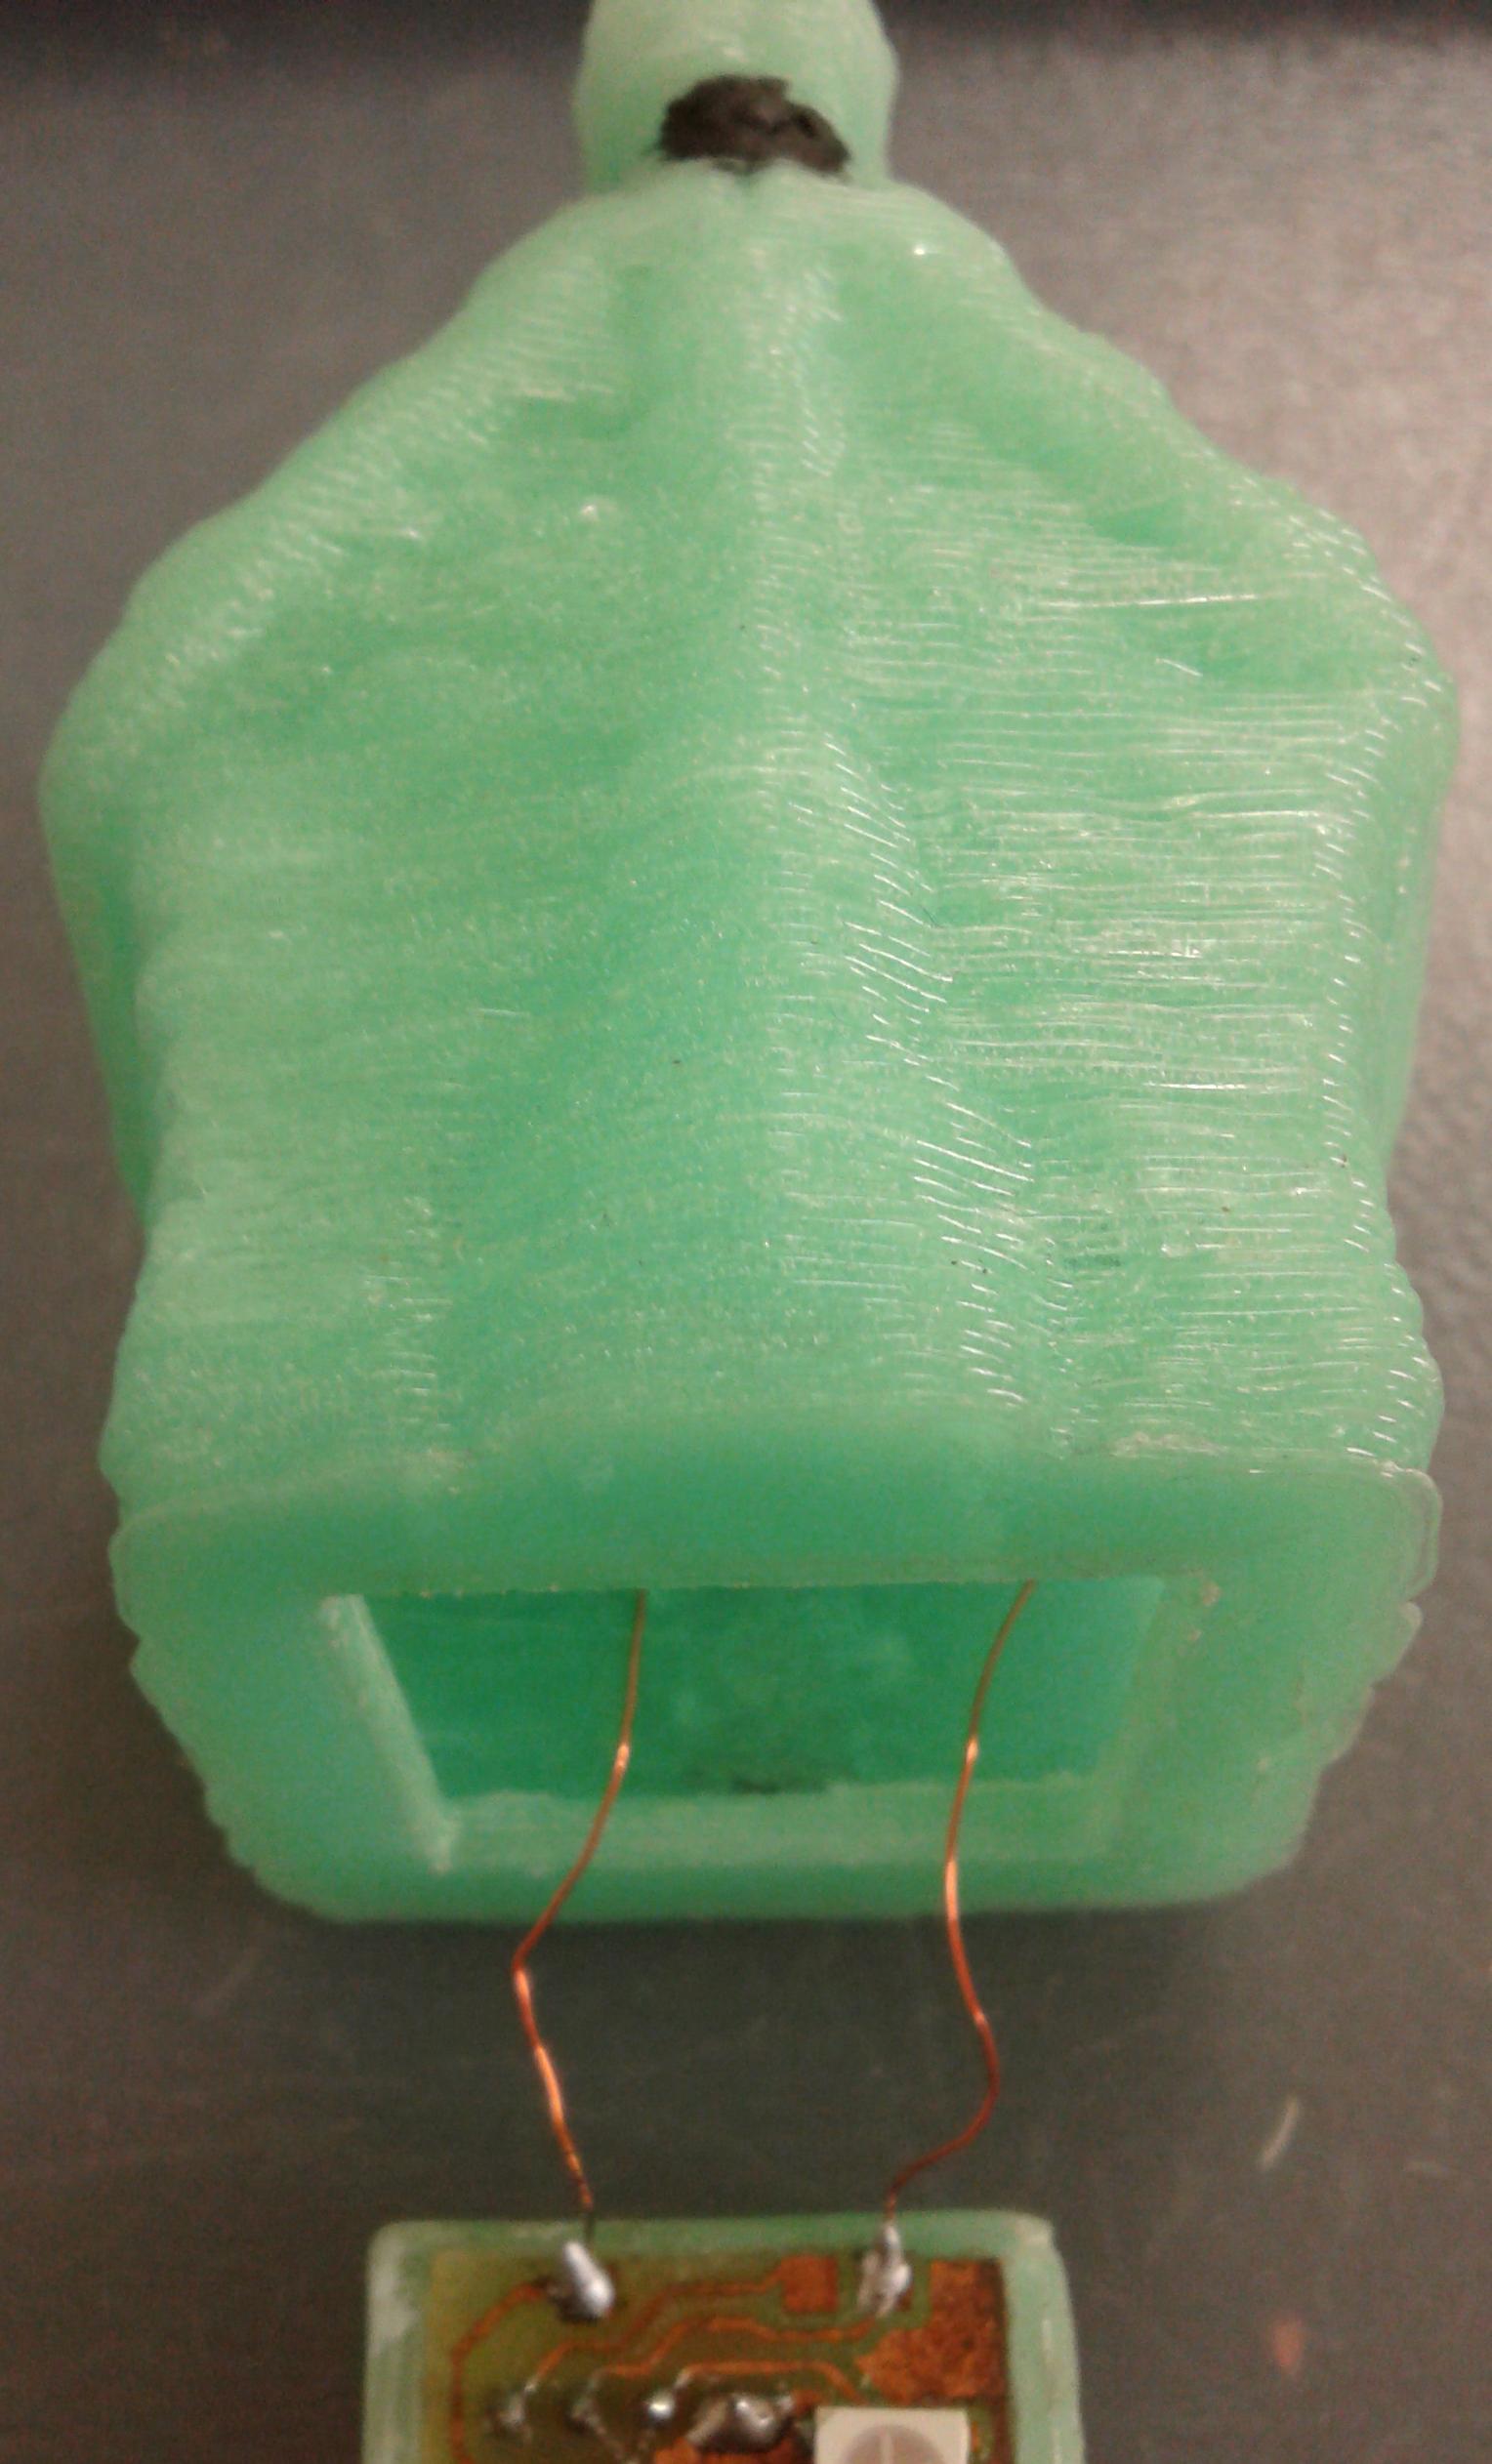
- In the photo (above) you can see a derivative of Stone cottage. We added a small fit for the electronics and the battery.
- Notice that these cute lamps work best with translucent filament.
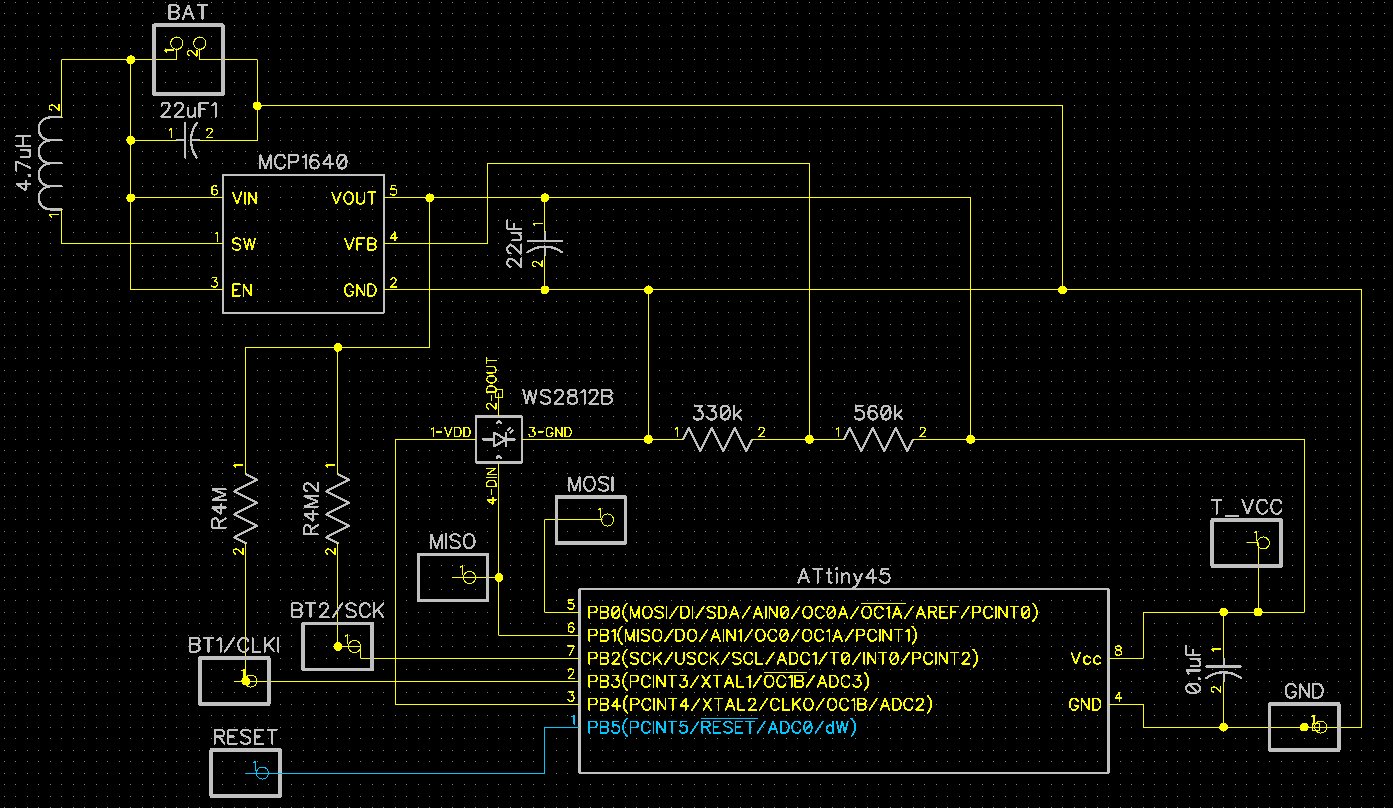
- PCB component list
- ATtiny45 (or 85)
- WS2812B led
- MCP1640
- capacitors: 0.1 μF, 22 μF (2).
- resistances: 330 kΩ, 560 kΩ, 4 MΩ.
- inductor: 4.7 μH.
- You’ll need a bit of magnet wire, roughly two 10 cm wires
(depends on the size of your object), and some bare paint, for the capacitive sensing buttons (BT1, BT2). - Batteries: whatever works best for you. Lithium batteries tend to have less self discharge, hence will last longer. (BAT in the schematics)
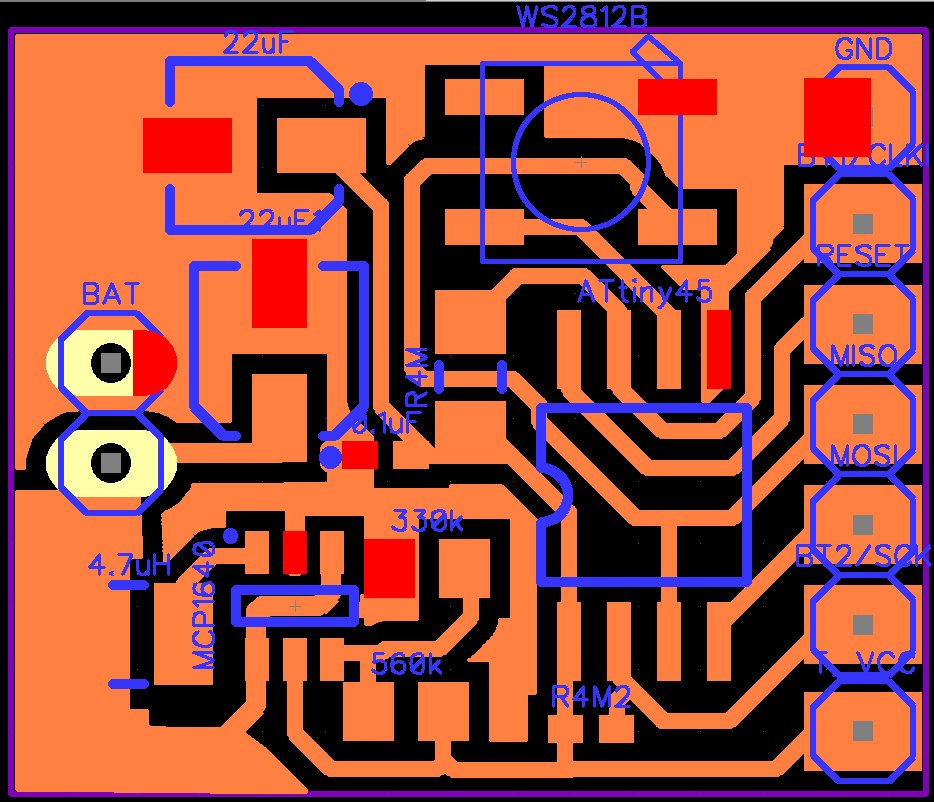
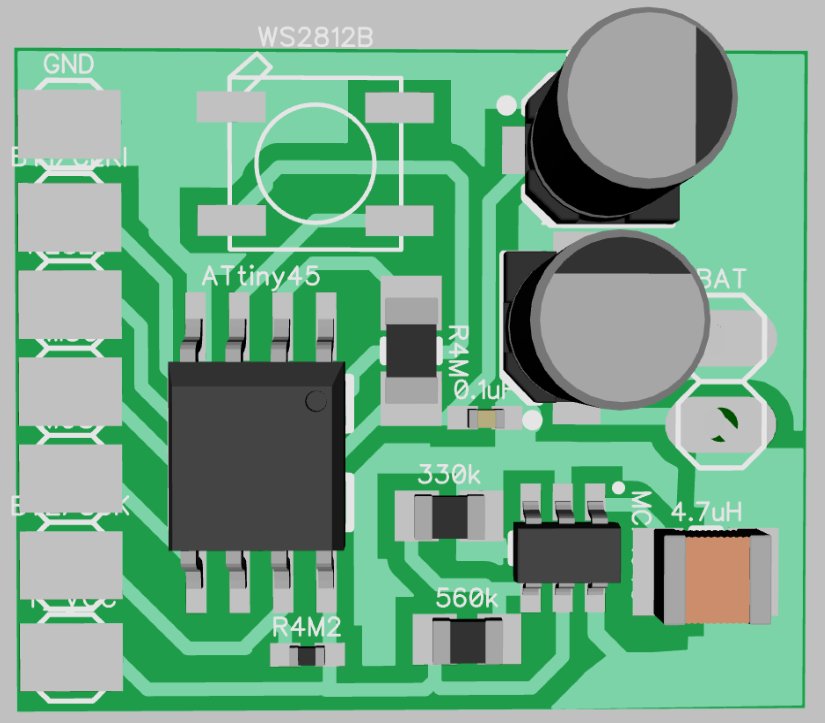
PCB assembly
Schematics
We build the pcb, but you can use a perfboard or just mount it on a breadboard. The pads on the left will allow you to program the ATtiny (if you use an smd ATtiny).
PCB
You must solder one wire to BT1 and the other to BT2. Each should be connected to a generous drop of bare paint that you place on the surface of the house. We chose the chimney for this. This bare paint drops will be your capacitive buttons: one to control the light intensity and the other to control the colour. You can read more about capacitive buttons here.
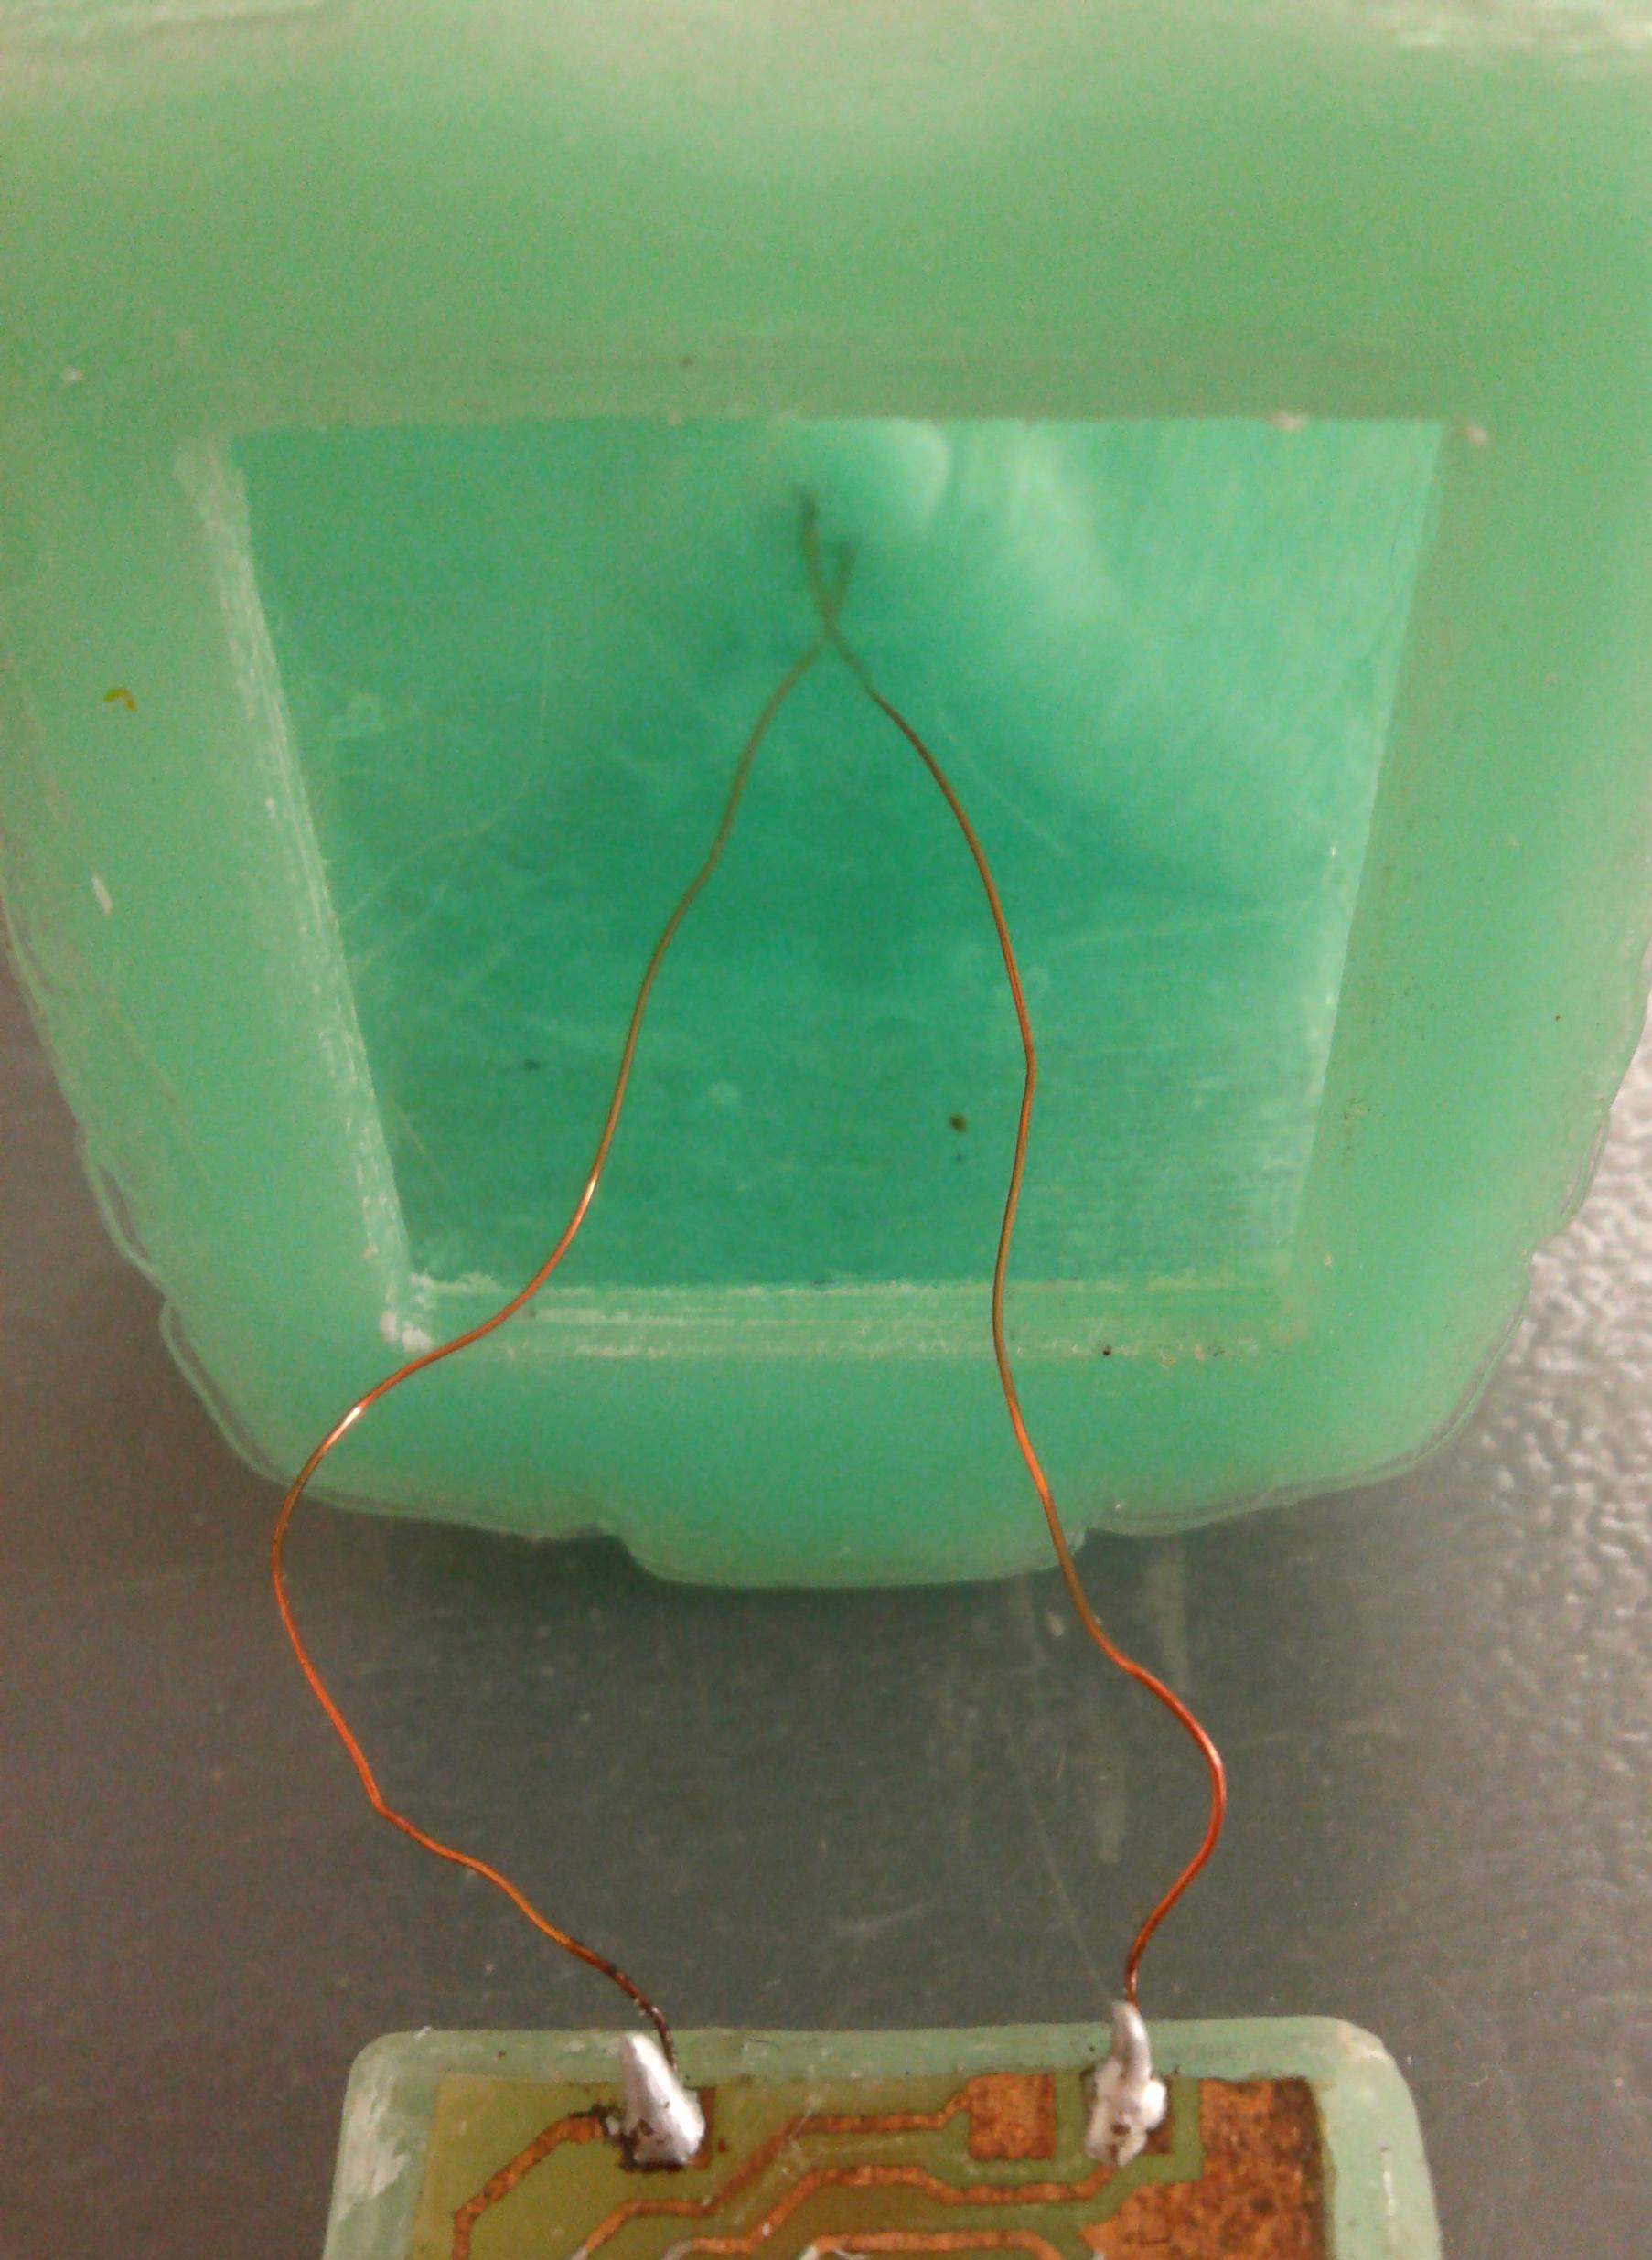
Capacitive sensing buttons
Add the battery and program the ATtiny (our source .ino file) and you’re done!
We chose a house to host our light project, but you can easily replace it by any other shape/design. Be creative and let us know all about it!
Don’t forget to HAVE FUN!